Few things in life are as universally comforting as the smell of freshly baked chocolate chip cookies wafting through a warm kitchen. Whether you are a seasoned baker or someone picking up a mixing bowl for the very first time, making chocolate chip cookies from scratch is one of the most rewarding culinary adventures you can undertake. This guide walks you through everything you need to know — from understanding your ingredients to mastering technique — so that every batch you pull from the oven is golden, gooey, and absolutely irresistible.
A Brief History of the Chocolate Chip Cookie
Before we get our hands floury, it is worth appreciating the origin of this beloved treat. The chocolate chip cookie was invented in the 1930s by Ruth Wakefield at the Toll House Inn in Whitman, Massachusetts. The story goes that she chopped up a Nestlé semi-sweet chocolate bar and added it to her butter drop cookie batter, expecting the chocolate to melt and spread throughout. Instead, the chips held their shape, and a legend was born. Nestlé eventually printed her recipe on their chocolate chip packaging, and the rest is delicious history.
Understanding Your Ingredients
Great cookies start with great ingredients and — more importantly — understanding what each one does. Every component in a chocolate chip cookie recipe has a purpose, and small changes can dramatically alter the final result.
1. Flour
All-purpose flour is the backbone of most chocolate chip cookie recipes. It provides structure. Too much flour makes cookies dry and cakey; too little makes them spread thin and crispy. Always measure flour correctly — spoon it into your measuring cup and level it off with a straight edge, or better yet, use a kitchen scale for precision.
2. Butter
Butter is responsible for flavor, richness, and texture. Most recipes call for unsalted butter so you can control the salt level yourself. The temperature of your butter matters enormously:
- Room-temperature butter creams well with sugar, trapping air and producing a lighter, fluffier cookie.
- Melted butter produces denser, chewier cookies with more spread.
- Brown butter adds a rich, nutty, toffee-like depth of flavor that elevates a basic recipe into something truly special.
3. Sugar
Most recipes use a combination of white granulated sugar and brown sugar. White sugar promotes crispness and spread; brown sugar (which contains molasses) adds moisture, chewiness, and a subtle caramel flavor. The ratio between the two determines whether your cookie leans crispy or chewy.
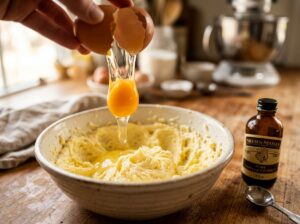
4. Eggs
Eggs bind the ingredients together and add richness. Whole eggs contribute both fat (from the yolk) and structure (from the white). Using an extra egg yolk — without the white — produces a richer, more tender crumb. Always use large eggs at room temperature for best results.
5. Leavening Agents
Baking soda is the standard leavener in chocolate chip cookies. It reacts with the brown sugar’s acidity to produce carbon dioxide, helping the cookie rise slightly and spread. Some recipes add a small amount of baking powder for extra lift and a more cake-like texture.
6. Salt
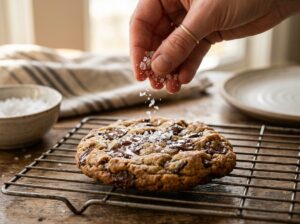
Salt is the unsung hero of cookie baking. It balances sweetness, enhances all other flavors, and prevents the cookie from tasting flat. Do not skip it. A sprinkle of flaky sea salt on top just before baking takes the flavor profile to an entirely new level.
7. Vanilla Extract
Pure vanilla extract adds warmth and aromatic depth. Always opt for pure over imitation vanilla — the difference in flavor is noticeable.
8. Chocolate Chips
You have options: semi-sweet, bittersweet, milk chocolate, or dark chocolate. Semi-sweet (around 60% cacao) is the classic choice and provides the perfect balance of sweetness and chocolate intensity. Chopping a quality chocolate bar instead of using chips gives you irregular shards and pools of melted chocolate for a more artisanal result.
Classic Chocolate Chip Cookies From Scratch
This recipe yields approximately 24 cookies and is the perfect starting point for any home baker.
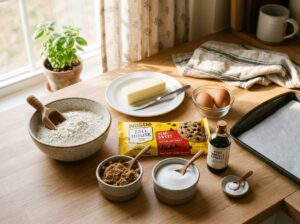
Ingredients
- 2¼ cups (280g) all-purpose flour
- 1 teaspoon baking soda
- 1 teaspoon fine sea salt
- 1 cup (225g) unsalted butter, softened to room temperature
- ¾ cup (150g) granulated white sugar
- ¾ cup (165g) packed light brown sugar
- 2 large eggs, at room temperature
- 2 teaspoons pure vanilla extract
- 2 cups (340g) semi-sweet chocolate chips
- Flaky sea salt, for topping (optional but highly recommended)
Instructions
Step 1: Prepare Your Workspace Preheat your oven to 375°F (190°C). Line two large baking sheets with parchment paper or silicone baking mats. Set aside.
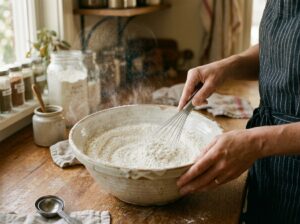
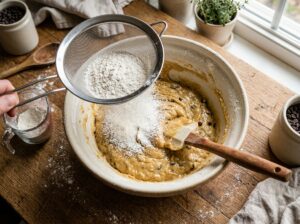
Step 2: Mix the Dry Ingredients In a medium bowl, whisk together the flour, baking soda, and salt. Whisking ensures even distribution of the leavening agent and salt, preventing any unpleasant pockets of bitterness in the finished cookie.
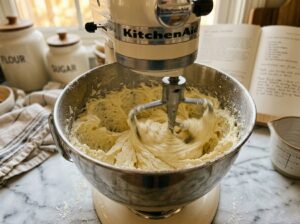
Step 3: Cream the Butter and Sugars In a large mixing bowl (or the bowl of a stand mixer fitted with the paddle attachment), beat the softened butter with both sugars on medium-high speed for 3 to 4 minutes until the mixture is light, pale, and fluffy. This step is called creaming, and it is critical — it incorporates air into the dough, which helps create a tender texture. Do not rush it.
Step 4: Add the Eggs and Vanilla Reduce the mixer speed to medium and add the eggs one at a time, beating well after each addition. Add the vanilla extract and mix until fully combined. Scrape down the sides and bottom of the bowl with a rubber spatula to ensure everything is evenly incorporated.
Step 5: Combine Wet and Dry Ingredients With the mixer on low, gradually add the flour mixture to the butter mixture. Mix only until the flour is just incorporated — overmixing at this stage develops gluten and can make your cookies tough. The dough should look cohesive and slightly sticky.
Step 6: Fold in the Chocolate Chips Using a rubber spatula or wooden spoon, fold in the chocolate chips by hand. This prevents over-mixing and keeps the chips evenly distributed throughout the dough.

Step 7: Portion the Dough Use a medium cookie scoop (about 2 tablespoons of dough per cookie) to portion the dough onto your prepared baking sheets, spacing the dough balls at least 2 inches apart to allow for spreading.

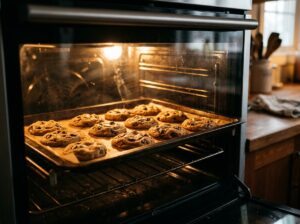
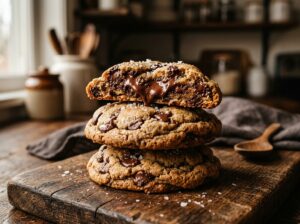
Step 8: Bake Bake for 9 to 11 minutes, or until the edges are set and golden but the centers still look slightly underdone and glossy. This is the secret to a perfectly chewy cookie — they will continue cooking on the hot pan after you remove them from the oven (a process called carryover cooking). If you like crispier cookies, bake for a minute or two longer.
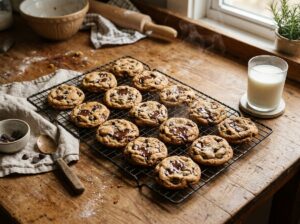
Step 9: The Finishing Touch As soon as the cookies come out of the oven, sprinkle each one with a pinch of flaky sea salt. This small step makes a profound difference. Let the cookies cool on the baking sheet for at least 5 minutes before transferring them to a wire rack.
Pro Tips for Cookie Perfection
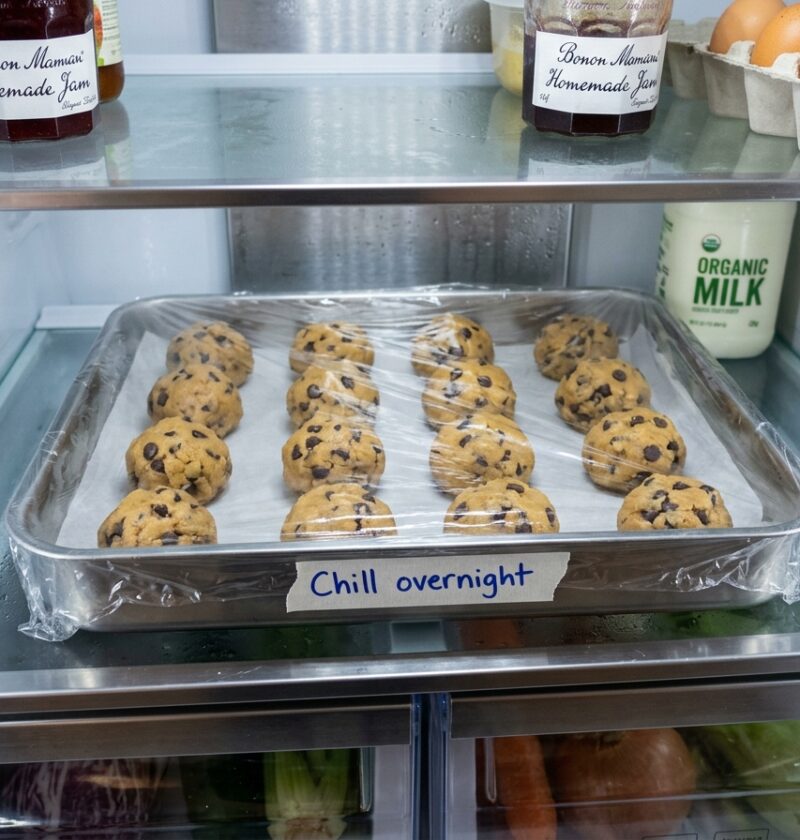
Chill the Dough
One of the best things you can do for your cookies is rest the dough in the refrigerator. Chilling the dough for at least 30 minutes — or up to 72 hours — allows the flour to fully hydrate, deepens the flavor through a process called enzymatic browning, and reduces spread so your cookies are thicker and chewier. If you can wait overnight, do it. The difference is remarkable.
Use a Kitchen Scale
Baking is chemistry, and precision matters. A kitchen scale removes the guesswork of measuring cups and guarantees consistent results every single time.
Bring Ingredients to Room Temperature
Cold butter and cold eggs do not cream or emulsify well. Pull your butter and eggs out of the refrigerator at least an hour before you begin.
Bang the Pan
Right after you pull the cookies from the oven, pick up the baking sheet and gently bang it on the counter two or three times. This causes the cookies to deflate slightly, creating those gorgeous crinkled, wrinkled tops that look like they came from a bakery.
Do Not Overbake
The biggest mistake home bakers make is overbaking. Pull the cookies when they look underdone in the center — trust the process. A pale, soft center straight from the oven becomes a perfectly chewy center once cooled.
Delicious Variations to Try
Once you have mastered the classic recipe, the world of chocolate chip cookies opens up beautifully.
- Brown Butter Chocolate Chip Cookies: Melt the butter in a saucepan over medium heat, stirring constantly until it turns golden amber and smells nutty. Let it cool before using. This one change transforms the flavor profile dramatically.
- Sea Salt Caramel Chocolate Chip Cookies: Press a soft caramel candy into the center of each dough ball before baking.
- Double Chocolate Chip Cookies: Replace ¼ cup of the flour with ¼ cup of unsweetened cocoa powder for a deeply chocolatey base.
- Oatmeal Chocolate Chip Cookies: Replace ½ cup of flour with rolled oats for a heartier, chewier texture.
- Espresso Chocolate Chip Cookies: Add 1 tablespoon of instant espresso powder to the dough to intensify the chocolate flavor without making the cookies taste like coffee.
Storing and Freezing
Room Temperature: Store baked cookies in an airtight container at room temperature for up to 5 days. Place a slice of bread in the container to keep the cookies soft — the cookies absorb moisture from the bread.
Freezing Baked Cookies: Freeze cooled cookies in a zip-lock bag for up to 3 months. Warm them in a 300°F (150°C) oven for 5 minutes to revive that fresh-baked quality.
Freezing Cookie Dough: Portion the raw dough into balls and freeze them on a baking sheet. Once solid, transfer to a freezer bag. Bake straight from frozen, adding 2 to 3 extra minutes to the baking time. This way, you are always just minutes away from warm, fresh cookies.
Conclusion
Making chocolate chip cookies from scratch is more than just following a recipe — it is an act of care, creativity, and joy. Understanding your ingredients, respecting the process, and applying a few key techniques will consistently reward you with cookies that are deeply flavorful, perfectly textured, and absolutely memorable. Whether you stick to the timeless classic or venture into creative variations, every batch you bake from scratch carries a warmth that store-bought cookies simply cannot replicate.
So preheat that oven, soften that butter, and get baking. Your perfect chocolate chip cookie is waiting.